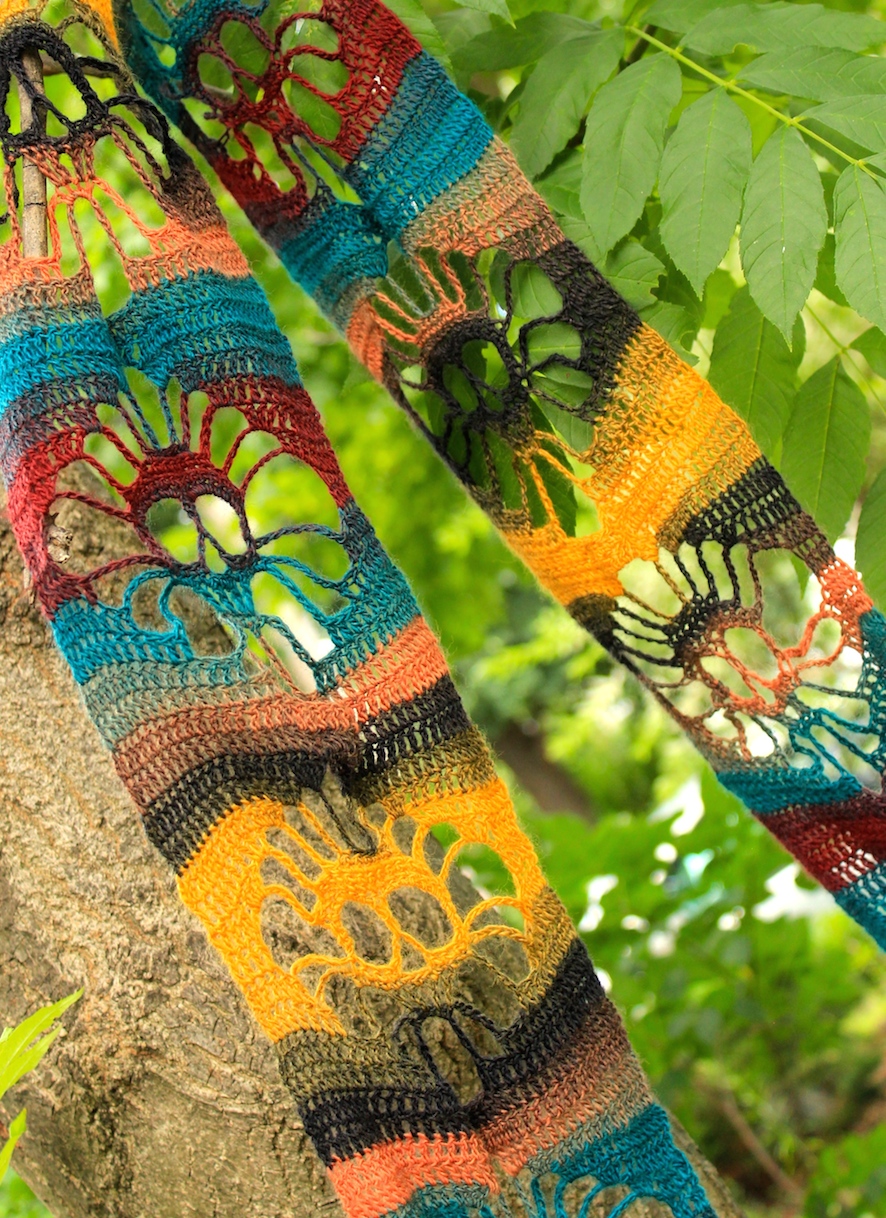
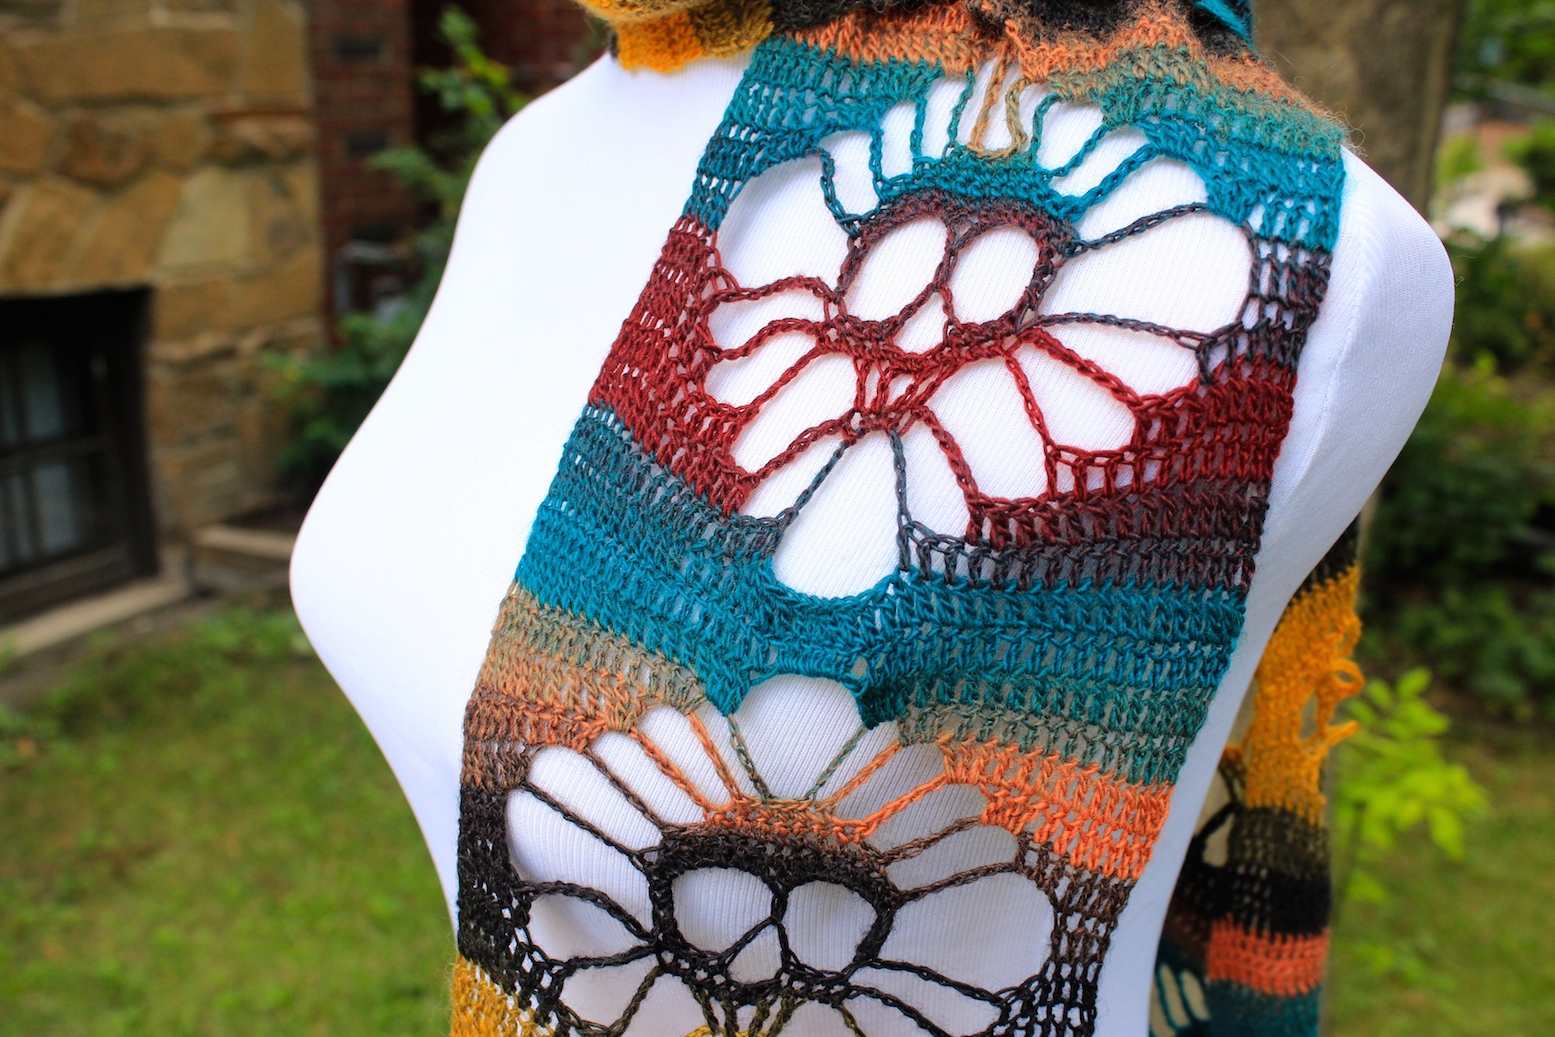
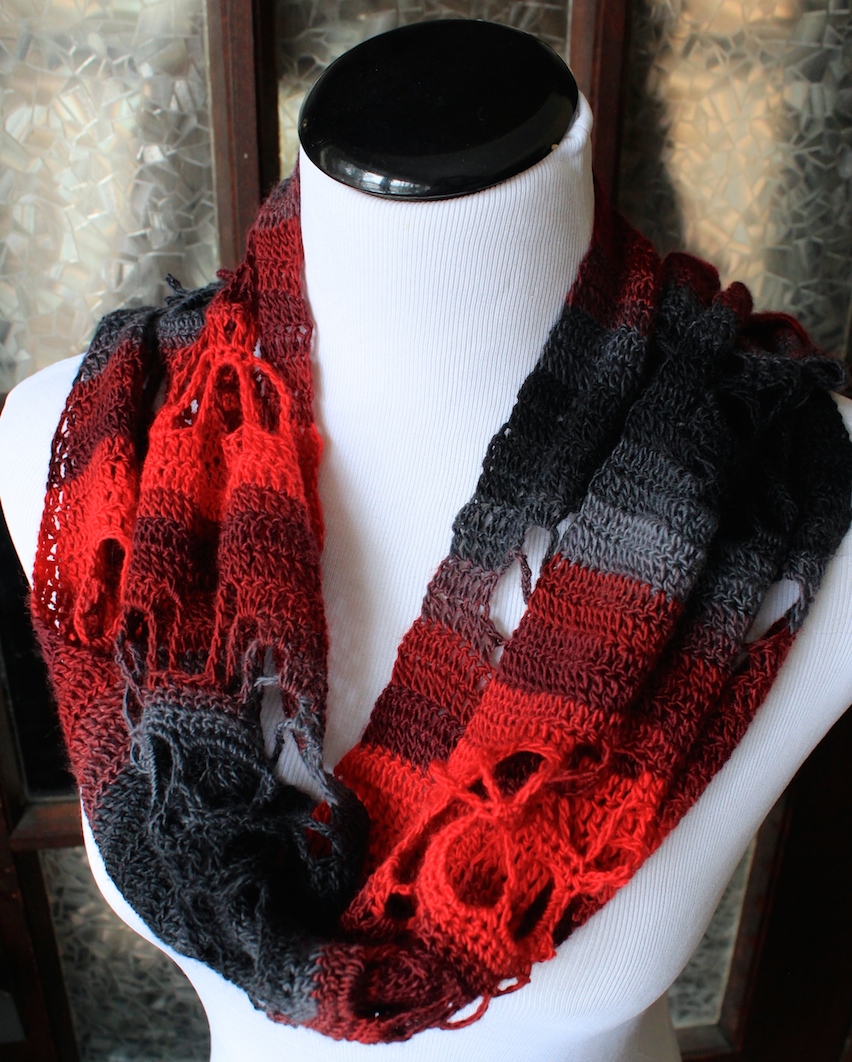
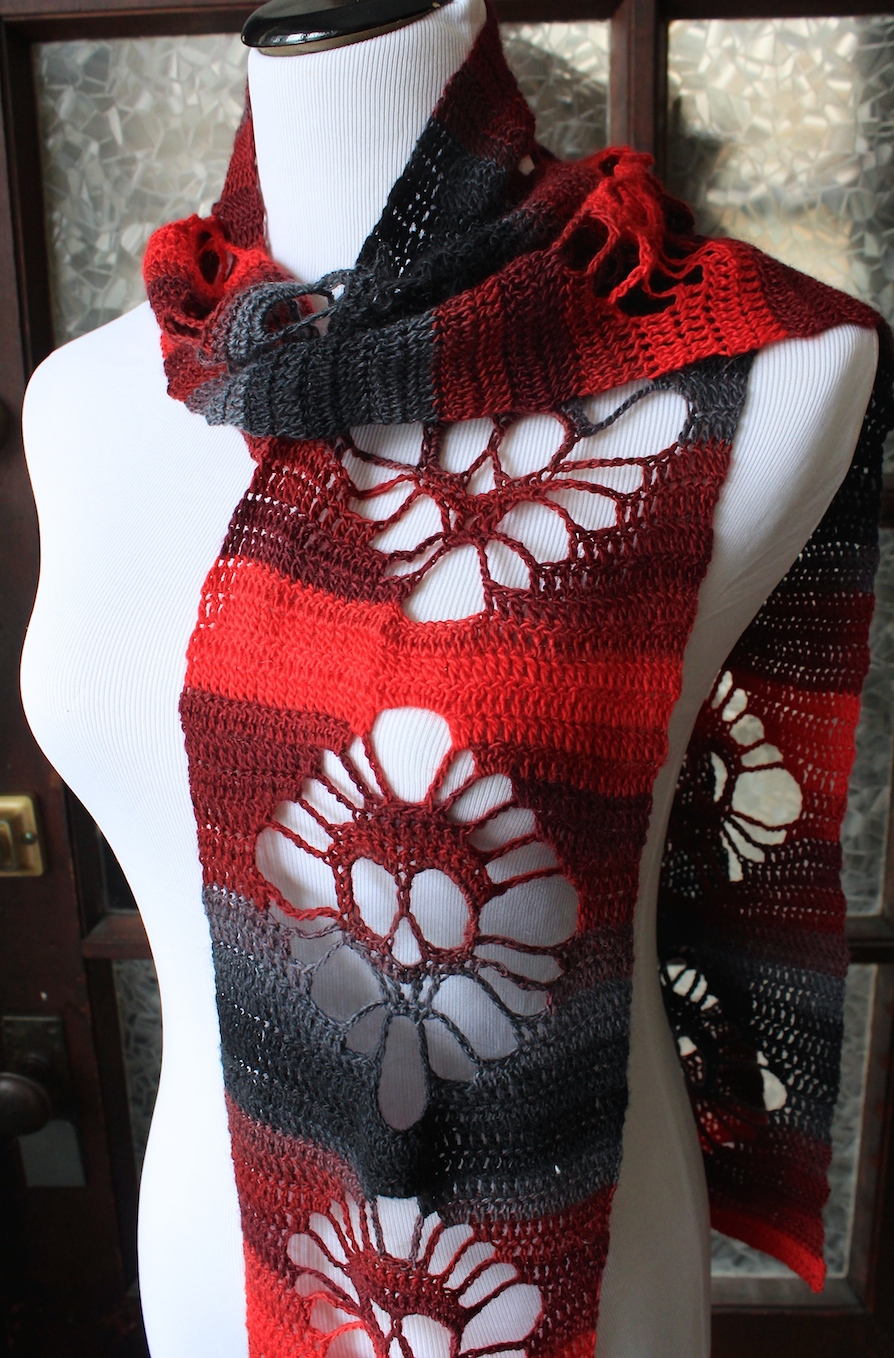
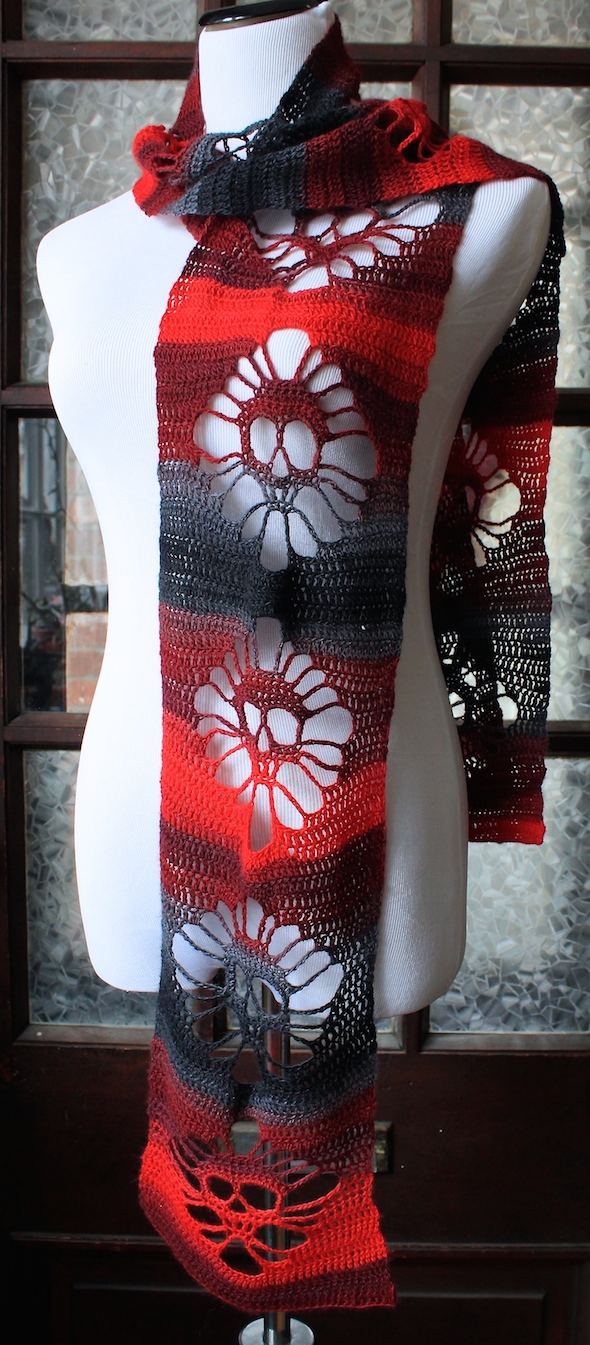
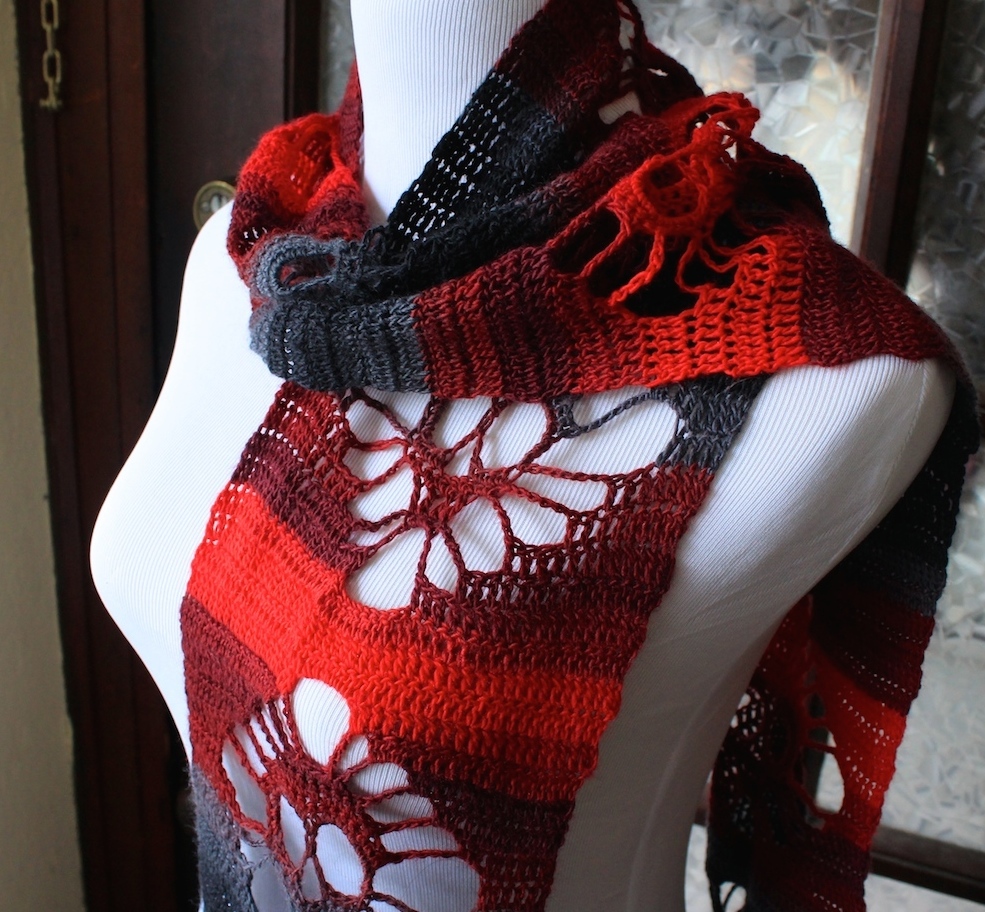
Crocheted Solid Body Skull Scarf
©Copyright 2015 Stitch Noir/Amanda Hyde All videos, patterns and posts have been created, and/or modified from other patterns, by me. If you want to share this information with someone, please credit me (and the patterns that inspired my work, if applicable), by sharing the link to this post. If you want to share on your own blog / website, then you may use the first photo in this post and link back to this post. You may sell this pattern. Thank you.
This item is made with a fingering weight yarn. I hand-dye many suitable fingering weight and sock yarns here on my website….you can check out my yarns in my shop!

Welcome to my very first available pattern! Please, please let me know if you come across any mistakes or have any suggestions for changes. This is the first time I have written out a pattern for others.
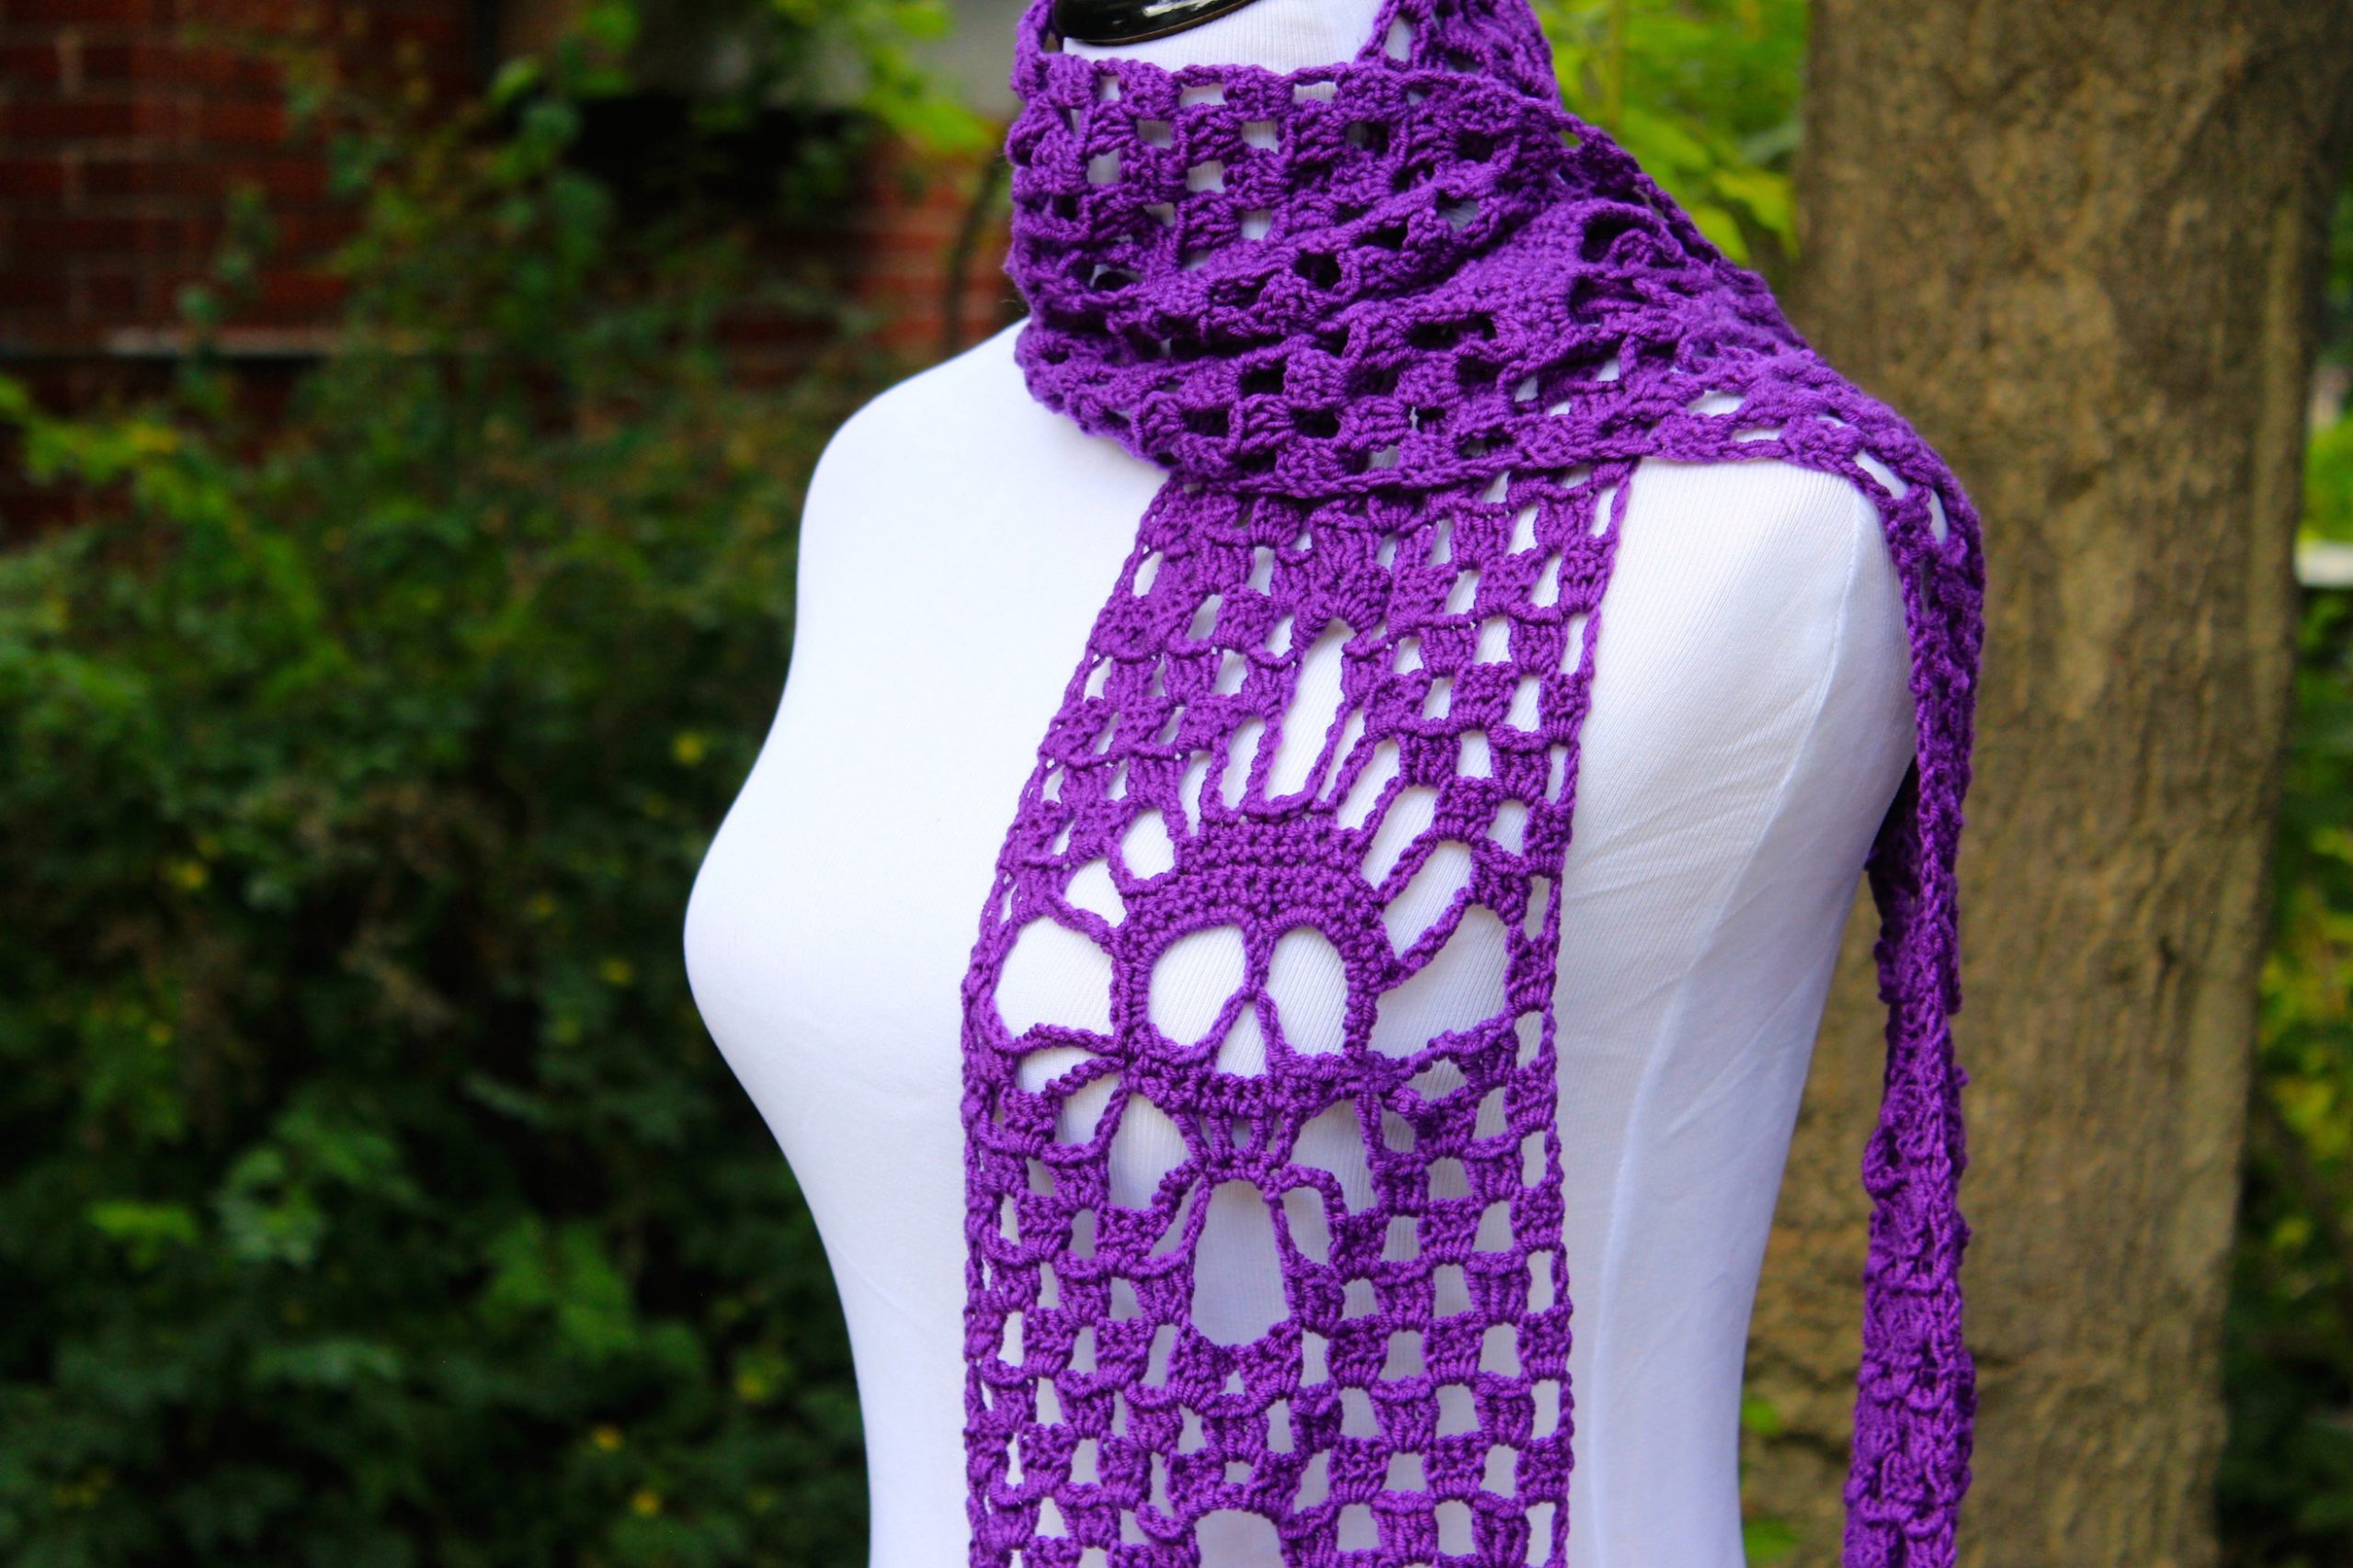
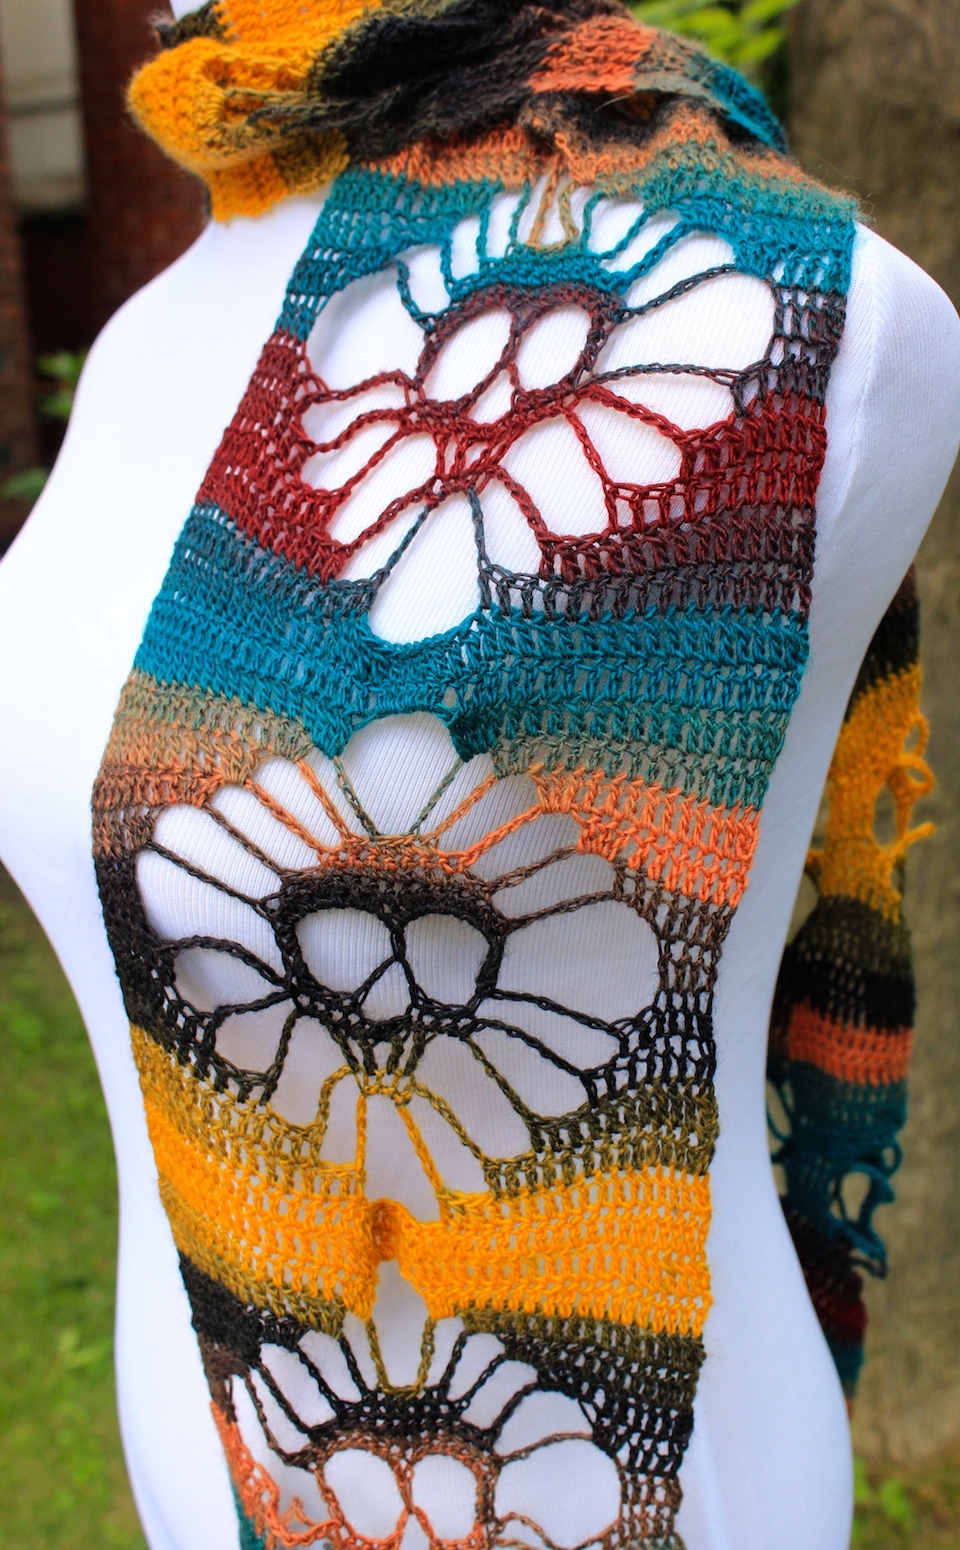
There are many versions of this skull pattern out there. I played with it for over a year now and modified it a bunch of different ways. There are pictures of various versions I created at the bottom of this post.
For this particular pattern, credit has to be given to some other folks who served as inspiration. This is a modified pattern of two existing free patterns:
Crochet Skull shawl/Döskallesjal pattern by kungen och majkis
and
Narrow Crochet Skull Scarf:
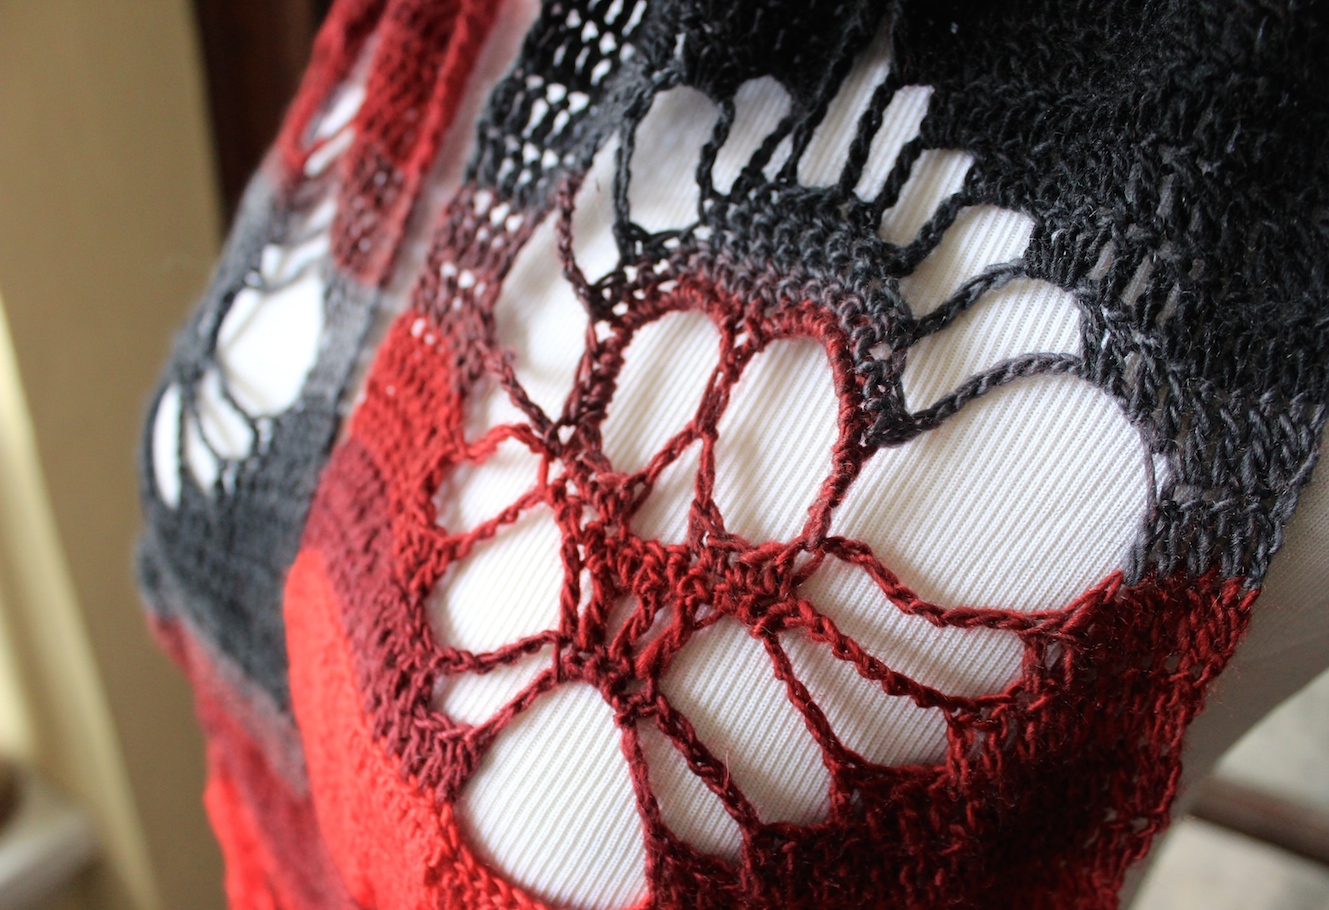
I love this skull pattern and have played with it a dozen different ways. I really like creating it as a solid piece like in this pattern as it really makes the skulls *pop*! 🙂 Details on the yarn I used etc can be found on my Ravelry page.
EDIT NOTE: Many people have trouble with a bulge appearing after row 4. Some solutions to this are to 1) create more than 10 chain stitches to allow for a bit more stretch. 2) Adjust the number of chains in each set of chain stitches. Try adding a couple more to allow for more stretch. 3) Check the comments for solutions by readers. 4) Block your piece after you have completed it.
Materials I used:
2.75 mm (C) hook
500 yards of 4-ply fingering weight yarn (I used Darling by Katia) will give you a 9”wide 80” long scarf
Abbreviations:
CH – chain
SL ST – slip stitch
SC – single crochet
DC – double crochet
STS – stitches
NOTES:
The CH 3 at the beginning of each row does not count as a stitch.
At the beginning and end of each skull section, you should have 46 sts.
Make two identical halves and connect them at the top with loose slipstitches or single crochets across. This allows the skulls to be upright on both sides. My scarf has 6 skulls per side but you can make it as long or short as you wish be adding or removing skulls.
PATTERN:
Loosely CH 49. (You can go up one hook size to CH)
Row 1 – DC in 4thCH from hook, DC to end of row. Turn (46 sts)
Row 2 & 3 –CH 3 (does not count as a stitch), DC across to end. Turn (46 sts)
Row 4 –CH 3, 18 DC, CH 10, skip 10 sts, 18 DC. Turn
Row 5 –CH 3, 15 DC, skip 3 DC and CH 6, 4 SC around the chain-10 from previous row, CH 6, skip 3 DCs, 15 DC to end of row. Turn
Row 6 –CH 3, 12 DC, skip 3 DC and CH 6, (1 DC, ch1, 1 DC, ch1, 1 DC, ch1, 1 DC) in the 4 SC from the previous row, CH 6, skip 3 DC, 12 DC to end of row,. Turn
Row 7 –CH 3, 9 DC, skip 3 DC and CH 6, (11 SC on the four dc/ch from previous row as follows: 2 around chain, 1 in first DC, 1 around the chain, 1 in the second DC, 1 around the ch, 1 in the third DC, 1 around the ch, 1 in the 4th DC, 2 around the chain), CH 6, skip 3 DC, 9 DC to end of row. Turn

Row 8 – (making the eyes) CH 3, 7 DC, skip 2 DC and Ch 8, 4 SC in the first 4 SC from previous row, Ch5, skip 3 SC, 4 SC in four remaining SCs from previous row. Turn.
Ch10, 1 SC around the 5ch space in the middle, ch10 and sl st in the first SC you made. Turn.
10 SC around each “eye” (or each 10 chain space), sl st in final stitch to end the eye. CH 8, skip first 2 DC, 7 DC to end of row. Turn.
Row 9 – CH 3, 5 DC, skip 2 DC and CH 10, 16 SC centred on skull (count 8 from the middle in each direction), ch10, skip 2 DC, 5 DC should bring you to end of row. Turn.
Row 10 –CH 3, 8 DC (5 DC and 3 DC around chain), CH 6, 12 SC centred on skull, CH 6, 8 DC (3 DC around chain, 5 DC in stitches from previous row). Should bring you to end of row. Turn
Row 11 –CH 3, 11 DC (8 DC and 3 DC around chain), CH 6, 8 SC centred on skull, CH 6,11 DC (3 DC around chain, 8 DC in stitches from previous row). Should bring you to end of row. Turn
Row 12 -CH 3, 14 DC (11 DC and 3 DC around chain), CH 6, 6 SC centred on skull, CH 6,14 DC (3 DC around chain, 11 DC in stitches from previous row). Should bring you to end of row. Turn
Row 13 -CH 3, 17 DC (14 DC and 3 DC around chain), CH 6, 4 SLST centred on skull, CH 6, 17 DC (3 DC around chain, 14 DC in stitches from previous row). Should bring you to end of row. Turn
Row 14 -CH 3, 20 DC (17 DC and 3 DC around chain), CH 6, 20 DC (3 DC around 6 chain from previous row, 17 DC in remaining DCs from previous row). Should bring you to end of row. Turn
Row 15 –CH 3, 20 DC, 6 DC around chain space, 20 DC. Turn (46 sts)
Row 16 & 17 –CH 3, DC across to end, turn (46 sts)
Repeat Rows 4 – 17 for each additional skull until desired length. Weave in ends.
Next, create the second half of the scarf the same way.
Connect them across the top with loose slipstitches or single crochets. This allows the skulls to be upright on both sides. My scarf has 6 skulls per side but you can make it as long or short as you wish be adding or removing skulls.
©Copyright 2015 Stitch Noir/Amanda Hyde All videos, patterns and posts have been created, and/or modified from other patterns, by me. If you want to share this information with someone, please credit me (and the patterns that inspired my work, if applicable), by sharing the link to this post. If you want to share on your own blog / website, then you may use the first photo in this post and link back to this post. You may not sell this pattern. Thank you.